So as you know, I like to dumpster dive. I have written about some of my amazing finds from previous adventures. I have some more new stuff about other dumpster dives to write about soon but today I want to show you what I have done with one of my amazing finds.
So one night I found a mirror that hangs on the back of the door. It was brand new, in the casing, except it had a crack on it. So you know I snatched it right up because I had a vision for it. In my head I saw this awesome cracked mirror piece. Thanks to Pinterest, I was able to create this project in no time.
Items needed for this project:
- Mirror you don’t mind breaking
- Grout (any color of your choosing)
- Sponge or washcloth
- Hammer
- Gloves
- Liquid Nails
- Soap and water
- Safety goggles
Because I was using a body length mirror, I had to take this project to the garage to break the mirror up. There are a lot tutorials that say place the mirror in a brown paper bag and break it up. I couldn’t do this due to the size of my mirror. But if you do happen to want to do this project on a smaller scale, the safest way to do it is to place in a brown paper bag and then break it up with a hammer.

So with my hammer and safety glasses, I starting beating that mirror like it stole something!! There is no set number of times to beat the mirror, just beat it until you have the size of the pieces that you want. I wanted various sizes so some areas I beat more than others.
Once I had finished breaking the mirror, I put on my gloves so that I wouldn’t cut myself in the process of removing the glass. Removing the glass seemed a little tricky for me because the glass was glued to the board in order for it not to move. So that was a little tough detaching it from the board. Once I got it all cleared off (some just wouldn’t come off the board so I left it), I started gluing pieces randomly back on. I didn’t want it to look uniformed so I mixed small with large pieces.

Finally got all the pieces where I wanted them and the next step is to grout. I used BlueHawk Pre-mixed Vinyl Tile Grout from Lowes. By the way, Lowes is my favorite hardware store!!! They get all my money!!! I used the pre-mixed because I didn’t have time to be mixing the powder and water stuff. Now, it is cheaper but I just didn’t feel like doing that. The pre-mixed is just easier. I filled in all the cracks by just placing a layer of the grout on top of the whole mirror. I then used my wet washcloth and wiped off the extra grout. This step takes some time because you want to make sure you clean it well enough to see your mirror.

After I got about as much as I figured I would get off and made sure that the mirror was all even. I wanted it to feel as though you could wipe your hand over it and not feel too much unevenness or cut your hand from the edges of the mirror pieces. I let that dry for a few hours. Once it was dry, I used windex and cleaned the mirror and It was perfect!

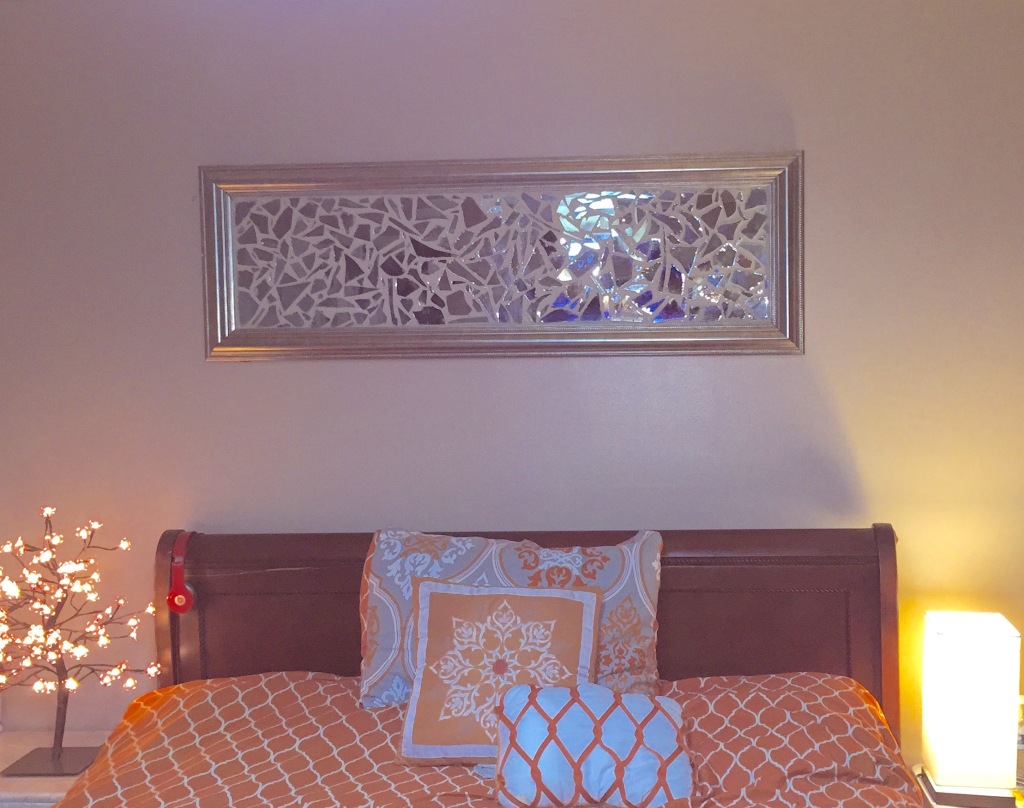
So this project was really for one mirror but I had so many pieces left that I decided to make another piece. I just happened (dumpster diving) to have a picture frame that had mirror pieces on the frame, so I thought that would be super cool. I used those pieces to create another piece for my living room.

I love my mirror art!! It’s amazing! I get so many compliments when people come over and they see it. People are like, “That’s so pretty, where did you get it?” You know I’m like, “Oh I made it myself!”

-MzMari3

I want to hear from you…